 In conventional bass angling the weedless-rigged rubber worm is such a mainstay because it is simple and easy to rig, appears natural and unhindered in the water and—most importantly—seldom fouls or snags. A fly equivalent to this lure is not commercially available.
 Whereas many hard-core conventional bass fishermen tend to fish larger bodies of water, the vast majority of the weekend worrier warm-water fly fishermen across the country spend their Saturdays not astride a Hunter bass boat on a large reservoir…but behind a neighbors’ barn harassing the farm-pond bass. The major handicap these fledgling fly casters have burdened themselves with (and what will, in the end, keep them forever loyal and tethered to the spinning rod) is a severe lack of proper fly-replacements for their go-to conventional lures and rubber baits.
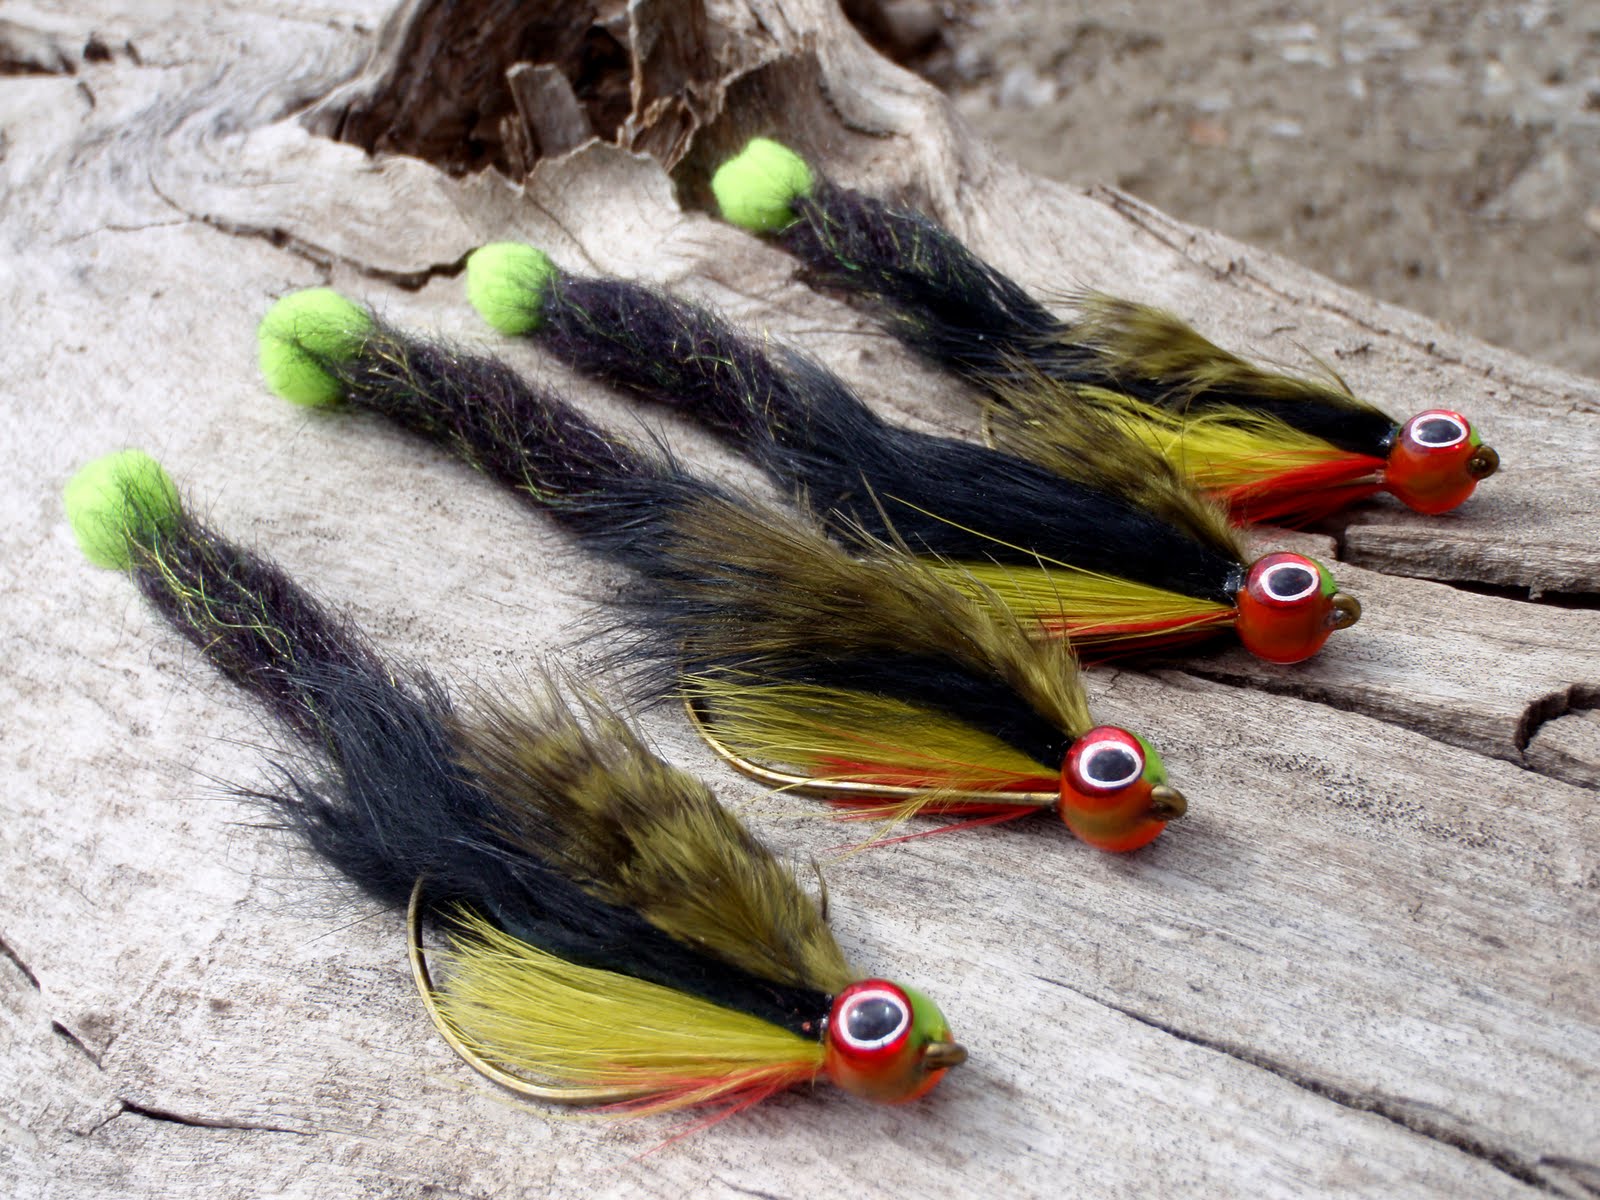
The Texas Ringworm is a simple fly to rig and fish when compared to its rubber-worm contemporaries. The hard-mono loop keeps the large TMC 8089 hook facing up and snag free. It stays in place even through the longest or brutal casting, but detaches immediately once a bass eats and the hook is set. Once the fish has been detached, the hard-mono loop is easily re-attached.

Texas Ringworm Recipe (Or buy online for $5.99 each)
Black Eel
Tail
Hook: TMC 105 #4
Thread 1: Daville’s 3/0 waxed monocord—dark brown (used as main dubbing loop)
Thread 2: Uni-Thread 6/0 black (used as small finishing dubbing loop)
Tip: Fluorescent Green Chartreuse McFlyfoam
Dubbing 1: Poul Jorgensen SLF Salmon & Steelhead dubbing “claret black”
Dubbing 2: Poul Jorgensen SLF Salmon & Steelhead dubbing “peacock”
Gangion: Hard Mono or Fluoro (.017) and Hareline Dubbin standard tubing “brown”
Body
Hook: TMC 8089 #2
Thread: Uni-Thread 6/0 olive
Throat 1: Fluorescent red marabou
Throat 2: Golden olive marabou
Main Body: Magnum rabbit strip “black”
Topping: 3 feathers Hareline Dubbin “Grizzly Marabou Olive” (GRIZM263)
Head
Core: Loon UV fly paint “yellow”
Eyes: Hareline Dubbin 3/16” Oval Pupil 3D Eyes Red/Black Pupil (OP3310)
Bottom: Loon UV fly paint “red”
Top: Loon UV Knot Sense
Outer Coating: Loon UV Knot Sense, then final coat of Hard-as-Hull
Sunfish
Tail
Hook: TMC 105 #4
Thread 1: Daville’s 3/0 waxed monocord—white (used as main dubbing loop)
Thread 2: Uni-Thread 6/0 olive (used as small finishing dubbing loop)
Tip: Montana Fly Frog’s Hair golden yellow
Dubbing 1: Dave Whitlock SLF dubbing “minnow belly”
Dubbing 2: Dave Whitlock SLF dubbing “dragonfly nymph olive”
Gangion: Hard Mono or Fluoro (.017) and Hareline Dubbin standard tubing “light olive”
Body
Hook: TMC 8089 #2
Thread: Uni-Thread 6/0 olive
Throat 1: Fluorescent red marabou
Throat 2: Shell pink marabou
Main Body: Olive Barred Magnum rabbit strip “light olive” (Hareline BMR212)
Topping: 3 feathers Hareline Dubbin “Grizzly Marabou Olive” (GRIZM263)
Head
Core: Loon UV fly paint “yellow”
Eyes: Hareline Dubbin 3/16” Oval Pupil 3D Eyes Orange/Black Pupil (OP3271)
Bottom: Loon UV fly paint “red”
Top: Loon UV Knot Sense
Outer Coating: Loon UV Knot Sense, then final coat of Hard-as-Hull

See More on this Method!


No comments:
Post a Comment
Note: Only a member of this blog may post a comment.